


⚡ Free Express Shipping in USA✦
🔥 Newest Arrival Collection Live Now✦
✨ SUBSCRIBE TO GET YOUR 10% Off✦

Last Updated: October 19, 2026
Loose charging cables and tangled wires scattered across the dashboard and center console create more than just a messy appearance. They can distract drivers, obstruct views of gauges and controls, and make it harder to find the right cable when needed. Cable clutter also puts stress on charging connectors and cable jackets, potentially shortening their lifespan. When cables shift during hard braking or turns, they may catch on seat rails or get pinched between panels. Reducing car cable clutter keeps your vehicle interior organized, maintains focus on the road, and protects your charging equipment from unnecessary wear.
CarNook Co. specializes in car organization and mobile accessories designed to solve exactly these kinds of everyday problems. The goal of this guide is to walk through practical, straightforward steps to reduce car cable clutter and keep your charging setup clean and functional.
Before organizing anything, take time to see what cables you actually have and where they currently sit. Open your glove compartment, check under seats, and look around the center console. Count how many charging cables you own and what devices they serve. Some cables might be duplicates or ones you rarely use.
Next, identify your main charging locations. Do you charge primarily from a dashboard outlet, a center console outlet, or a rear seat outlet? Which cables get plugged in most often? Understanding your actual usage patterns helps determine which organization method will work best for your setup.
Finally, measure the distances. If your phone sits on the dashboard but the power outlet is in the console, you need a longer cable than if both are close together. Knowing these distances prevents buying clips or organizers that are too short or too long for your space.
The foundation of good cable organization is deciding what stays in your car and what doesn't. Remove cables you haven't used in the last month. Store seasonal or backup cables at home instead of keeping them taking up space.
For the cables that stay, group them by function. Keep phone charging cables together, tablet cables in another spot, and any vehicle-specific cables separate. This makes it faster to grab what you need without hunting through a tangled mess.
Consider a dedicated storage spot for cables when they're not in use. A small organizer bag, a zippered pouch, or even a labeled container tucked under the seat keeps inactive cables out of sight. This approach works especially well for road trips when you bring extra cables but don't need them plugged in constantly.
| Organization Method | Best For | Storage Location |
|---|---|---|
| Cable bag or pouch | Backup cables, road trips | Under seat or trunk |
| Labeled containers | Multiple device types | Center console |
| Dedicated dashboard organizer | Frequently used cables | Dashboard or vent |
| Bundled with clips | Active daily use | Along dashboard edge |
Cable clips and adhesive organizers are among the most effective tools for reducing car cable clutter. These small fasteners hold cables in place so they don't slide around, tangle, or get lost between seats during driving.
Adhesive cable clips stick directly to your dashboard or center console without tools or permanent damage. They work best on clean, smooth surfaces. Before applying any adhesive clip, wipe the mounting area with a dry cloth to remove dust and oils that might prevent a strong bond.
Position clips strategically along the path your cable travels. If your phone sits on the dashboard and your power outlet is in the console, place clips every 12 to 18 inches along that route. This keeps the cable from drooping or getting pinched.
Most adhesive clips can hold cables securely while still allowing you to remove the cable when needed. The key is not overstuffing a single clip with multiple thick cables, which can cause the adhesive to fail over time.
Wire saddles clamp around cables and mount to your dashboard using adhesive backing or small screws. Snap-in fasteners fit into existing panel gaps or cup holders, requiring no adhesive at all. These options work well if you prefer a more permanent installation or if your dashboard surface doesn't hold adhesive well.
Snap-in fasteners often cost less than adhesive clips and don't leave residue if you remove them. They're a good choice for rental vehicles or if you like to change your setup frequently. Wire saddles provide a tighter grip on cables and work well for heavier cables that might slip out of simpler clips.
Routing is where a tidy setup is won or lost. Clips and ties hold a cable in place, but the path you choose determines whether the cable stays out of sight, out of the way of moving parts, and away from the driver's line of sight. Before you stick anything down, plan the route from the power outlet to the device and check it against the safety points below.
Secure the cable loosely with clips or ties along the planned path, then test the setup before finalizing. Open and close the doors, adjust the seats, and operate the pedals and steering wheel through their full range. If a cable pulls tight, binds, or rubs against a hard edge, reroute it rather than forcing it. Follow the clip or tie manufacturer's instructions for surface preparation and adhesion, since requirements vary by product.
Most charging cables are longer than needed for typical dashboard-to-console setups. Excess cable length bunches up and creates clutter. Managing this extra length is one of the most effective ways to reduce car cable clutter overall.
Coil excess cable neatly and secure it with a small cable tie or velcro strap. Tuck the coil behind the dashboard trim, under a seat, or inside a small organizer pouch. Keep the coil small and compact rather than letting it sprawl across the console.
Another approach is to use a retractable charging solution that extends only as much cable as needed and retracts the rest automatically. This eliminates excess cable permanently and keeps your setup clean whether you're actively charging or not.
CarNook™ 4-in-1 Retractable Fast Car Charger →

If you frequently switch between multiple devices, consider having separate short cables for each device rather than one long cable that works for everything. A 3-foot phone cable takes up far less space than a 10-foot cable coiled and stored.
Cables that shift during driving create clutter and can wear out connectors and jackets over time. The right fastener depends on how often you change your setup, where the cable runs, and whether you want a removable or more permanent installation. The table below compares common options by use case.
| Fastener | Best for | Trade-offs |
|---|---|---|
| Adhesive clips | Daily charging along a fixed route | Adhesion depends on surface; removal can leave residue |
| Velcro ties | Bundling slack and setups that change | Reusable and adjustable; can loosen over time |
| Zip ties | Permanent routing along a fixed path | Not reusable; over-tightening can stress the jacket |
| Electrical or gaffer tape | Temporary holds and edge runs | Can leave residue; adhesion weakens in heat |
| Split wire loom or sleeve | Bundling several cables on one route | Adds bulk; must be sized to the cable bundle |
| Retractable charger | Drivers who charge multiple devices | Higher upfront cost; depends on outlet placement |
Wrap the tie snugly but not so tight that it crushes the cable jacket. Leave a small amount of slack so the cable can move slightly without stressing the connector. Trim the tail of a zip tie flush so it does not scratch trim or catch on clothing. Velcro ties are reusable and adjustable, which makes them a practical choice when your setup changes with passengers or road trip gear.
Electrical tape or gaffer tape can hold a cable temporarily along an edge or under a panel. Avoid masking tape or painter's tape, which tends to lose adhesion in a warm car. Test a small, hidden section first to confirm the tape does not leave residue when removed.
Split loom wraps around one or more cables and bundles them into a single unit, which protects the jackets from abrasion where cables rub against trim or each other. Size the loom to the bundle so it does not slide, and cut it slightly longer than the run so the ends tuck under trim. Sleeves can also add a layer of protection where cables run near heat sources, though no sleeve replaces proper routing away from hot surfaces.
Cabin heat, sunlight, and repeated flexing can degrade cable jackets over time. Periodically inspect cables for frayed jackets, exposed wire, bent connectors, or discoloration near the plug. Replace a damaged cable rather than taping over it, and stop using any cable that feels hot during charging. Keep cables away from vents that blow hot air and from surfaces that get direct sun, and avoid pinching cables in doors, seat rails, or console lids.
Once a month, take a minute to check the setup: confirm clips are still adhered, ties are not crushing the jacket, the cable is not pinched by seat movement, and no cable crosses the pedals or airbag trim. Re-tension or reroute as needed. Follow the fastener manufacturer's instructions for installation and removal to help prevent residue and surface damage.
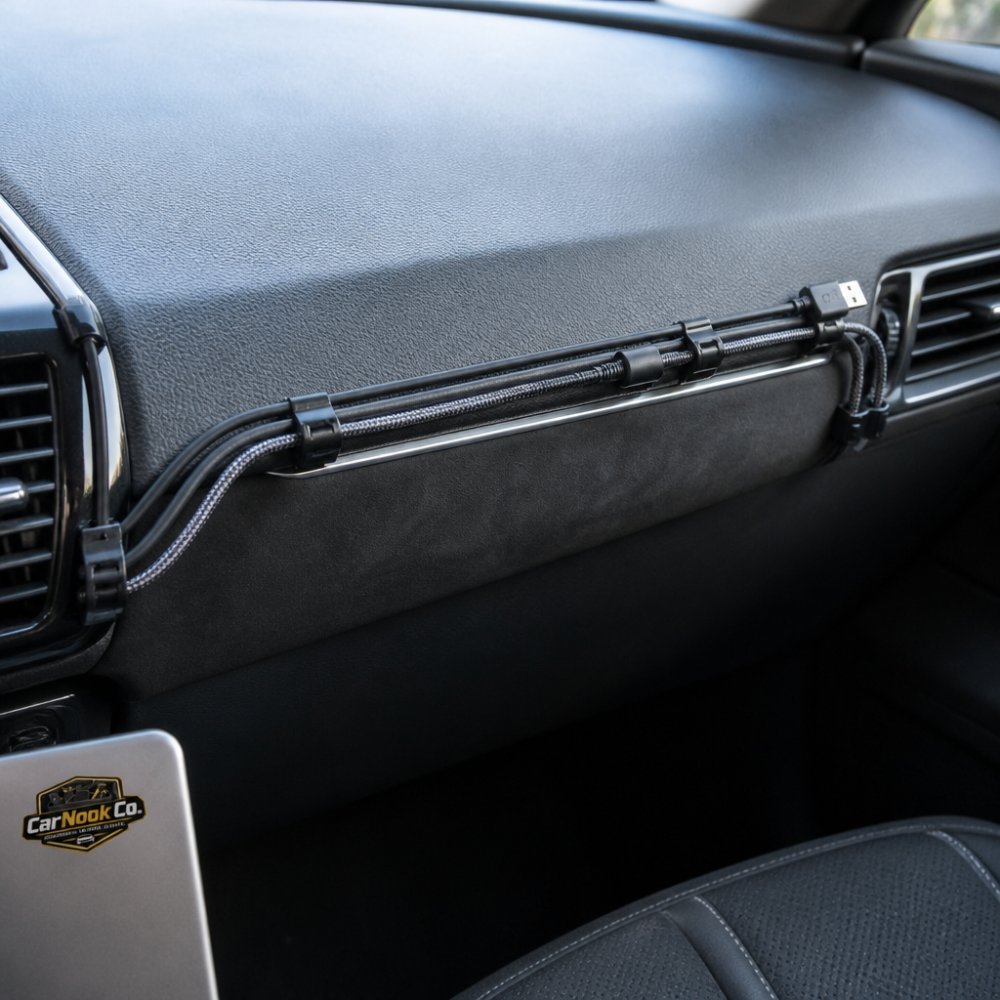
For drivers who want the ultimate in cable management, a retractable charging solution combines a power outlet, charging cables, and automatic retraction in one compact device. These solutions eliminate loose cables entirely by keeping cable length hidden until needed.
Retractable solutions work best if you have a dedicated power outlet and charge multiple devices regularly. They cost more than individual clips or organizers but eliminate the need for multiple separate cables and storage solutions. For road trips or families with multiple phones and tablets, the simplicity and organization benefit often justify the investment. CarNook Co. offers a range of car phone mounts and charging accessories designed to complement your cable management setup and keep your devices secure and accessible while driving.
Avoid cramming too many cables into a single clip or organizer. Overloading causes the clip to fail or the adhesive to weaken. Use multiple clips spaced appropriately instead.
Do not route cables where they could catch on seat adjusters or get pinched between moving parts. Test any cable route through a full range of seat movement before securing it permanently.
Resist the urge to use cables that are much longer than needed. A 10-foot cable for a 2-foot distance creates unnecessary bulk. Buy or use appropriately sized cables for your actual setup.
Avoid leaving cables plugged in when not actively charging. Unused cables sitting in outlets take up space and can overheat. Unplug and store cables when you're done charging.
Do not use adhesive clips on textured or porous surfaces where they won't stick well. Test adhesion on a small area first, or choose snap-in fasteners or zip ties instead.
Car cable clutter doesn't require expensive solutions or complicated installations. Start with a simple assessment of what cables you actually use, then apply clips, ties, or routing techniques that match your vehicle and charging habits. Explore the full range of car organization and charging solutions at CarNook Co. to find the right fit for your vehicle and lifestyle.
Start by assessing all your cables, then use a combination of methods: adhesive clips to secure cables to the dashboard or console, zip ties to bundle cables together, and protective sleeves to cover wires. Route cables behind panels when possible, hide extra length in storage compartments, and consider a retractable charging solution to eliminate loose cords entirely. The best approach depends on your vehicle layout and how many devices you charge.
Use cable ties or zip ties to bundle your charger cable loosely, then secure it with an adhesive clip to your dashboard or center console. Avoid wrapping the cable too tightly, as this can damage it over time. For the neatest solution, consider a retractable car charger, such as the CarNook™ 4-in-1 Retractable Fast Car Charger, that automatically retracts the cable when not in use, keeping your setup clean and preventing tangles.
Store spare cables in a labeled container or resealable bag in your glove compartment, center console, or under a seat. Keep them separate from active cables to avoid clutter in your main charging area. If you use split wire loom or protective sleeves, wrap unused cables before storing them to prevent damage and keep them organized for quick access during road trips.
Gaffer tape or electrical tape can temporarily hold cables in place, but it's not ideal for long-term use. Tape can leave sticky residue on your vehicle interior and may degrade in heat. Adhesive clips, cable ties, and wire saddles are better choices because they're designed for vehicles, reusable, and won't damage your dashboard or console.

