



Table of Contents
- Why Car Mount Suction Fails: The Core Reasons
- Signs of a Worn-Out Suction Cup
- Surface Preparation: Why Cleaning Matters
- How to Restore Suction Cup Stickiness
- Suction Cup vs Adhesive Mount: Which Holds Up Better?
- Weight Limits and Load Distribution
- Cable Tension and Mount Stability
- Cold Weather Performance and Non-Glass Surfaces
- Troubleshooting Falling Mounts: Step-by-Step
- Frequently Asked Questions
Last Updated: September 16, 2026
Why Car Mount Suction Fails: The Core Reasons
Understanding why car mounts lose suction power starts with the vacuum seal between the cup and the mounting surface, and that failure almost always traces back to four things: temperature swings, surface contamination, degraded rubber, and physical stress from weight or cable tension. This guide from CarNook Co. explains why car mounts lose suction power and how to fix it without buying a replacement every few months.
A suction cup holds because outside air pressure is higher than the near-vacuum inside, pressing the rubber flat against glass. Anything that lets air creep back under the lip destroys that pressure difference, and the culprit is usually a combination of factors rather than one dramatic failure.
Most guides tell you to press harder or buy a new mount, but a cup that keeps popping off is telling you something specific about its environment, and the fix usually takes minutes.
How Heat and Temperature Fluctuations Break the Seal
Thermal expansion is the most common cause of seasonal suction failure. A parked car in direct sunlight pushes interior surface temperatures well above ambient, softening the rubber and expanding the trapped air inside the cup.
When the cup cools overnight, the rubber contracts and internal air pressure drops. That cycle repeats daily, working the seal looser each time, a mount that held in spring often releases on its own by August.
The fix is placement, not force. Mounting on a shaded section of glass, or on a dashboard mount that sits out of the direct sun path, dramatically slows the cycle. CarNook's DashGrip Phone Mount uses a compact dashboard-mounted design that keeps the phone within sight while sitting lower in the cabin, away from the worst of the windshield heat load.

Material Degradation and UV Exposure
Ultraviolet radiation breaks down the polymer chains in rubber over time. The rubber loses pliability, develops a glossy or hardened surface, and stops conforming to the microscopic texture of the glass, and no amount of pressing restores a reliable airtight seal.
Rubber oxidation shows up as a chalky residue or slight color shift on the cup's edge. A cup in this state has lost its friction coefficient and its ability to form a vacuum. This is a materials problem, not an installation problem, and it is the point where cleaning stops helping and replacement becomes the honest answer.
Signs of a Worn-Out Suction Cup
A worn-out suction cup shows four reliable signals: a visible warp or ripple in the rubber edge, a chalky or shiny surface that no longer feels tacky, a seal that releases within hours instead of days, and residue left on the glass after removal. Any two together mean the cup is past its useful life.
Check the lip first. Run a fingertip around the edge and feel for flat spots or a wavy profile. A healthy cup has a uniform, slightly soft edge that springs back when pressed. Warped rubber will not seat flush, and no cleaning technique compensates for a lip that cannot make contact.
Surface Preparation: Why Cleaning Matters
Most suction failures not caused by heat or age come from contamination on the mounting surface. Silicone residue from cleaning sprays and skin oils create a microscopic barrier that air travels through. The cup is not failing; the surface underneath it is.
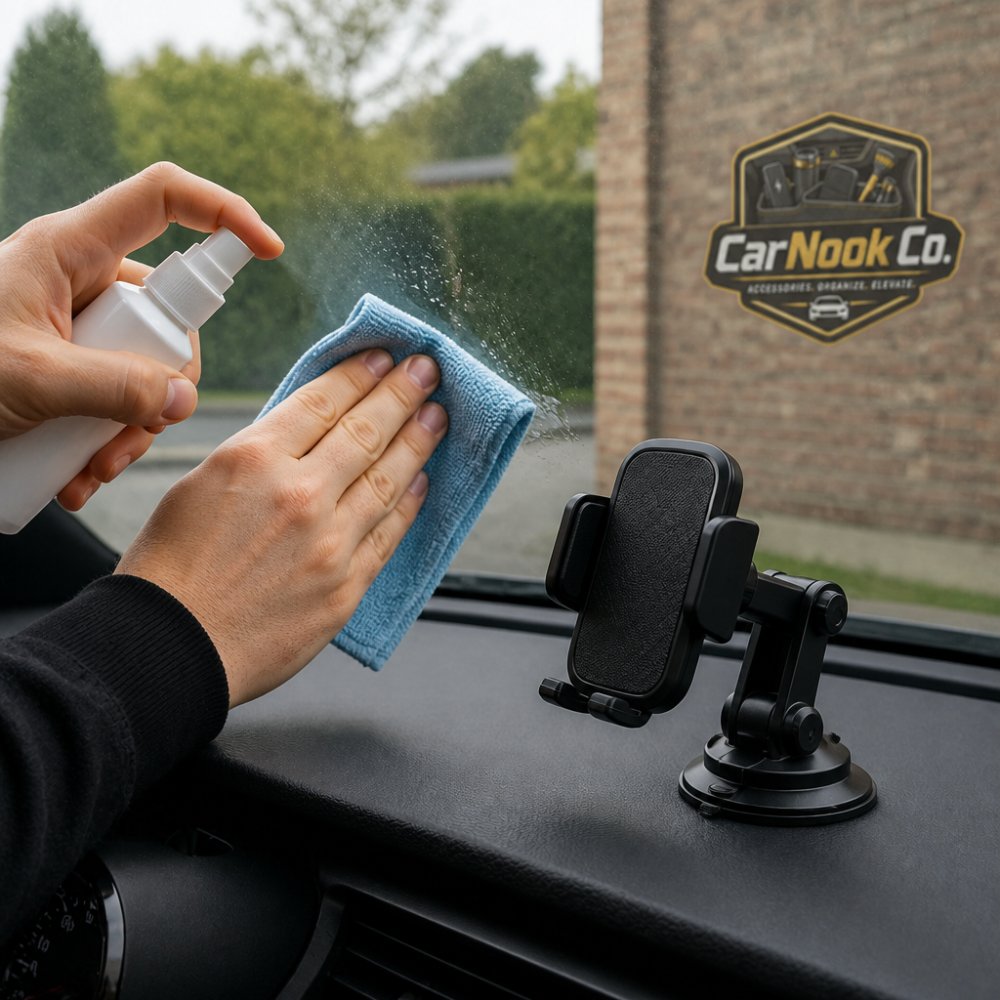
The right routine is short. Wipe the mounting area with isopropyl alcohol on a lint-free cloth, let it flash off completely, and mount while the surface is still warm from the cabin. Avoid ammonia-based glass cleaners and streak-free shine products, which leave behind exactly the film that ruins a vacuum seal.
How to Clean Suction Cup for Car Mount
Cleaning a suction cup for a car mount takes about two minutes and requires only warm water, mild dish soap, and a lint-free cloth. Wash the cup itself, not just the glass, because oils transfer from the rubber to the surface every time you press it down.
- Remove the mount and separate the cup from the arm if the design allows.
- Rinse the cup under warm running water to lift loose dust.
- Apply a drop of mild dish soap and work it into the lip with your fingers, focusing on the inner rim where the seal forms.
- Rinse thoroughly. Soap left on the rubber acts as a release agent.
- Air dry completely, or blot with a lint-free cloth. Do not towel-dry with a kitchen rag, which deposits lint and oils.
- Clean the mounting surface separately with isopropyl alcohol and let it dry.
Mount within a few minutes of cleaning. Handling the cup for too long before installation reintroduces the oils you just removed.
How to Restore Suction Cup Stickiness
Restoring stickiness is a diagnostic process, not a single trick. Work through the stages in order, each is more invasive than the last, and most cups recover at stage one or two.
Stage 1: Clean and Dry
Start here every time. Contamination on the cup lip or the glass is the most common cause of a seal that fails within hours, and it is the easiest to fix.
- Remove the mount and separate the cup from the arm if the design allows.
- Wash the cup in warm water with a drop of mild dish soap, working the soap into the inner rim with your fingers.
- Rinse thoroughly. Soap residue acts as a release agent and will defeat the seal.
- Air dry completely, or blot with a lint-free cloth. Do not use a kitchen towel, which leaves lint and oils.
- Clean the mounting surface separately with isopropyl alcohol on a lint-free cloth and let it flash off.
Mount within a few minutes of cleaning, handling the cup too long reintroduces the skin oils you just removed. If the cup holds for several days after this step, you are done.
Stage 2: Warm and Press
If cleaning buys you only hours, the rubber has likely stiffened. Heat temporarily restores pliability, letting the lip conform to the glass again.
- Soak the cup in hot tap water for one to two minutes. Do not use boiling water, which can warp the rubber permanently.
- Dry the cup and the mounting surface completely.
- Press the cup from the center outward, pushing trapped air toward the edges rather than trapping it in the middle.
- Hold firm pressure for 30 seconds before releasing.
- Engage the locking lever, if the mount has one, only after the cup is fully seated.
This buys weeks, not months, but it is often enough to carry a cup through a cold snap or a road trip. If the cup holds a week or more after warming, repeat the process rather than replacing the mount.
Stage 3: Chemical Rejuvenation of Rubber
If warmth and cleaning fail, the rubber has hardened past the point where physical methods help. Chemical rejuvenation is the next option, and also the one most likely to go wrong, so treat it as a last resort before replacement.
Rubber compounds contain plasticizers, small molecules that keep the polymer chains flexible. Over years of heat cycling and UV exposure, those plasticizers migrate out or break down, and the material becomes stiff and brittle. Chemical rejuvenation uses a solvent to draw residual plasticizers back to the surface, temporarily restoring tack.
A common approach is a short soak in a dilute glycerin solution or a dedicated rubber restorer, followed by a thorough rinse and full dry. The cup usually comes back tacky for a few weeks. The trade-off most guides miss: drawing plasticizers to the surface depletes the rubber's remaining reservoir, so the treatment accelerates the eventual failure. Use it to extend a cup through a season, not to save it indefinitely.
What not to do:
- Do not use petroleum-based products, silicone sprays, or WD-40 on a suction cup. They leave an oily film that destroys the seal and can degrade the rubber further.
- Do not boil the cup. Boiling water can warp the lip and permanently deform the rubber.
- Do not stretch or bend the cup to "loosen" it. Stretching creates micro-tears that become leak paths.
- Do not apply heat with a hair dryer on high. Uneven heating warps the cup more than it helps.
When to Stop Trying and Replace
Replacement is the honest answer when the cup shows any of these signs:
- A visible warp, ripple, or flat spot in the lip that does not spring back when pressed.
- A chalky, shiny, or hardened surface that no longer feels tacky after cleaning.
- A seal that releases within hours even after warming and cleaning.
- Residue left on the glass after removal, which indicates the rubber is breaking down.
Any two together mean the cup is past its useful life. Pressing a hardened cup harder does not restore the seal; it deforms the lip permanently, and you will chase the problem until you replace the mount.
CarNook™ DashGrip Phone Mount →
If you have worked through all three stages and the mount still will not hold, the practical move is to switch designs rather than buy another cup. CarNook's MagClip Phone Holder uses a compact magnetic hold that does not depend on a vacuum seal, which suits drivers who are tired of re-seating a cup every few weeks.

Suction Cup vs Adhesive Mount: Which Holds Up Better?
Adhesive mounts hold better in heat and over long periods, while suction mounts win on portability and repositioning. That trade-off is the entire decision, and it depends on whether the mount stays in one car or moves between vehicles.
| Factor | Suction Cup Mount | Adhesive Mount |
|---|---|---|
| Heat resistance | Moderate, degrades with cycles | High, until the pad ages out |
| Repositioning | Unlimited | One-time placement |
| Residue on removal | None | Adhesive backing residue |
| Cold weather | Poor below freezing | Good |
| Best for | Rental cars, multiple vehicles | Permanent single-car install |
Adhesive backing uses a pressure-sensitive bond that does not rely on air pressure, so thermal expansion does not defeat it. The catch is permanence. Removing an adhesive mount usually means scraping residue off the glass or dash, and the pad cannot be reused once it lifts.
For drivers who switch between a car, a backpack, and a rental, a suction or magnetic design makes more sense. CarNook's MagClip Phone Holder uses a compact magnetic hold with one-hand attachment, which suits people who mount and unmount several times a day rather than leaving a phone in place permanently.
Weight Limits and Load Distribution
Every mount has a load capacity, and exceeding it is the fastest way to defeat a good seal. A suction cup rated for a bare phone will fail quickly under a phone plus a thick case plus a charging cable, because the added mass turns every bump into a lever pulling at the cup's edge.
Load distribution matters as much as total weight. A phone hanging off the end of a long arm applies far more torque to the cup than the same phone mounted close to the glass. Shortening the arm, or choosing a low-profile holder, reduces the use without reducing the weight.
The practical rule: if the mount sags slightly when you let go, the load is already past what the seal can hold long-term. That sag is the cup's edge lifting microscopically, and it will only get worse.
Cable Tension and Mount Stability
A taut charging cable is a slow, constant pull on the mount, and one of the most overlooked causes of seal failure. The cable does not need to yank the phone to cause damage; steady tension in one direction gradually works air under the cup's lip on that side.
Route cables with slack. A loop of cable tucked behind the mount, or a cable clip on the dash, removes the load entirely. Vibration matters too: a cable that swings during driving applies an oscillating force, which is harder on a seal than constant pull.
If the phone sits in a mount that also holds a charging cable, check the cable routing every time you install. It takes five seconds and prevents most of the gradual failures people blame on the cup.
Cold Weather Performance and Non-Glass Surfaces
Most suction-mount advice is written for summer. Heat gets the attention because heat failures are dramatic and visible, but cold-weather failure is just as common and far less understood. The two problems have opposite mechanisms, and treating them the same way is why so many drivers give up on a mount that worked fine in July.
Why Suction Cups Fail in Freezing Temperatures
Rubber has a glass-transition temperature, the point at which it shifts from soft and elastic to stiff and glassy. Every suction cup compound sits above that threshold at room temperature, which is why the cup feels tacky and conforms to glass. Drop the cabin temperature into the teens or single digits overnight, and the rubber stiffens. A stiff cup cannot flow into the microscopic peaks and valleys of the glass, so the contact line that forms the vacuum seal becomes incomplete.
The second effect is moisture. Warm cabin air carries water vapor, and when the windshield cools below the dew point, a thin film of condensation forms on the glass. Mount a cup on that film and you are sealing against water, not glass.
What actually helps in cold weather:
- Warm the cup in your hands or against a heater vent for 30 to 60 seconds before mounting. This restores pliability temporarily and drives off surface moisture.
- Mount on a section of glass that has been warmed by the defroster for a few minutes, not on a cold windshield you just scraped.
- Avoid mounting first thing in the morning on a frosted or fogged windshield. Wait until the glass is clear and dry.
- Expect shorter hold times in winter and re-seat the mount weekly rather than monthly.
- If you park outside overnight, consider a mount that does not rely on a vacuum at all for the coldest months.
Why Suction Cups Fail on Dashboards, Vinyl, and Textured Surfaces
A suction cup needs three things from a surface: smooth, non-porous, and flat enough that the lip makes continuous contact around its full circumference. Glass delivers all three. Most dashboards deliver none of them.
Windshield Texture and Aftermarket Tint
Even glass is not always glass. Aftermarket window tint adds a polymer film between the cup and the windshield, changing the physics in two ways. First, tint film is slightly compliant, so it shifts microscopically under the pressure of the cup, breaking the continuous contact line the vacuum depends on. Second, some films have a low-surface-energy finish designed to resist fingerprints and smudges, and that same finish resists rubber grip.
Curved Glass and the Contact-Line Problem
Modern windshields are curved in two directions, and a suction cup can only conform to a gentle single curve. On a strongly curved section, the lip lifts on one side no matter how hard you press. The fix is placement: move the mount toward the flatter center of the windshield, or toward the lower corner where curvature is typically gentler.
Suction cups need smooth, non-porous, uncoated, and only gently curved glass. If the surface is textured, tinted, porous, or strongly curved, no cleaning or rejuvenation routine will produce a lasting seal. In those cases, a mechanical or magnetic mount is the practical answer.
Troubleshooting Falling Mounts: Step-by-Step
Work through this sequence in order. Most mounts are back in service by step three, and the ones that are not usually need replacement rather than more effort.
Total time: 15 minutes Difficulty: Beginner
- Clean the glass. Wipe with isopropyl alcohol and a lint-free cloth. Let it dry fully.
- Inspect the cup lip. Look for warping, chalkiness, or a shiny hardened edge. If the lip is deformed, skip to step 8.
- Wash the cup. Warm water, mild soap, focus on the inner rim. Rinse and air dry.
- Warm the rubber. Soak in hot tap water for one to two minutes to restore pliability.
- Press and hold. Seat the cup from the center outward, hold thirty seconds, then engage the locking lever if the mount has one.
- Check the load. Remove the phone and confirm the mount holds empty. If it does not, the seal is the problem, not the weight.
- Reroute the cable. Add slack so nothing pulls on the mount in any direction.
- Replace the cup or switch designs. If the lip is warped or the rubber is hard, a new cup or a magnetic holder is the practical answer.
Frequently Asked Questions
How do I make a suction mount sticky again?
Clean the suction cup and mounting surface with isopropyl alcohol, then soak the cup in warm soapy water for a few minutes. Dry it completely and press it firmly onto a clean, smooth surface. If the rubber feels hard or warped, replace the cup. For a reliable alternative, consider a dashboard mount like the CarNook DashGrip.
Why does my suction cup keep falling off?
The most common causes are dust or oil on the surface, extreme heat causing the rubber to soften, or a worn cup that has lost its pliability. Ultraviolet radiation and thermal expansion also degrade the seal over time. Clean both surfaces, avoid direct sunlight when installing, and check for cracks or warping. If the cup is older than a year, replacement is often the fastest fix.
Does heat affect car phone mount suction?
Yes. High temperatures soften the rubber and cause the air inside the cup to expand, which breaks the vacuum seal. This is why mounts often fail on hot days. Parking in shade and using a sunshade can help. If you frequently park in the sun, a mechanical mount or adhesive-backed option may hold up better than suction.
Can I use a suction mount on a textured or tinted windshield?
Suction cups need a smooth, non-porous surface for an airtight seal. Textured glass, tint film, and dashboard mats reduce surface tension and let air seep in. For those surfaces, an adhesive mount or a dash-mounted holder can be a better choice. Always check that the mounting area is clean and flat before attaching.