


⚡ Free Express Shipping in USA✦
🔥 Newest Arrival Collection Live Now✦
✨ SUBSCRIBE TO GET YOUR 10% Off✦

Last Updated: October 4, 2026
A curved dashboard presents a real challenge for any phone mount, and learning how to stabilize phone mount curved dashboard installations is essential for safe driving. The shape prevents direct contact between the mount's base and the surface, which means less grip and more movement when the vehicle accelerates, brakes, or turns.

Most phone mounts are designed for flat surfaces and rely on suction cups, adhesive pads, or clamps that need full contact with a flat plane. On a curved dashboard, the mount touches only at one or two points, creating instability.
Heat can soften adhesive tape, vibrations can loosen suction cups, and bumps and turns stress the mount's hold.
Getting your phone mount to stay put starts with preparation. A clean, properly assessed dashboard makes the difference between a mount that holds and one that fails.
Dust, oils, and residue prevent adhesive from bonding and reduce suction cup grip. Wipe the area with a dry microfiber cloth, then use a slightly damp cloth with mild soap and water, paying special attention to oily or sticky spots. Let the surface dry completely. For stubborn residue, use rubbing alcohol on a cloth to remove old adhesive, then let it dry fully.
Run your hand across different areas to find the flattest section, often below the steering wheel, near climate controls, or on a small shelf area. Avoid the most curved parts above the steering wheel. Verify the spot doesn't block your view of the road or interfere with airbags or controls, and test it by holding your phone there.
Not all phone mounts work equally well on curved surfaces. The type you choose matters as much as the installation technique.
A flexible base mount with an articulating arm can bend slightly to conform to a curved surface, whereas rigid mounts may rock or shift. For curved dashboards, a flexible or adjustable mount allows the arm to angle and keep your phone stable even if the base isn't perfectly flush.
CarNook's DashGrip Phone Mount features an adjustable viewing angle, which helps compensate for curved surfaces by allowing you to position the phone holder at the angle that works best for your specific dashboard shape.
Suction cup mounts create a vacuum seal and work well on smooth, flat surfaces, but may not seal evenly on a curved dashboard. Adhesive tape mounts bond the base to the dashboard and can adapt to minor curves. Adhesive mounts can be reliable on curved dashboards because they don't depend on an even seal. Suction cups are reusable and don't leave residue; adhesive mounts are permanent unless removed carefully. Choose based on whether you plan to move the mount later.
If you're using a suction cup mount, proper technique matters. A suction cup that isn't applied correctly will fail quickly.
Inspect the suction cup pad for cracks or tears, a damaged pad won't seal properly. Clean the pad with a damp cloth to remove dust and residue. Check that the dashboard surface is smooth and clean, then wipe it one more time with a dry cloth right before applying the suction cup.
Press the suction cup firmly onto the dashboard with steady, even pressure for several seconds. Pull gently to test the grip; if it comes away easily, press again and hold longer. Once attached, place your phone in the holder and observe for shifts or creaks. On a curved dashboard, a suction cup alone may not provide enough grip, consider reinforcing it with an adhesive gel pad underneath the base.
If your mount keeps slipping despite your efforts, the problem is rarely random. Identifying the specific failure mode, how and when the mount fails, helps you apply the right fix rather than guessing.
Observe exactly how your mount is failing. The pattern tells you what's wrong.
The mount rocks or tilts side to side. This indicates the base isn't making full contact with the curved surface. The mount is touching at only one or two points instead of across the entire base. The fix: reposition the mount to a flatter area of the dashboard, or use a flexible-base mount that may conform to the curve.
The mount slides downward or shifts during acceleration and braking. This suggests the adhesive or suction grip is insufficient for the forces your vehicle generates. The fix: reinforce with an adhesive gel pad under the base, or switch to an adhesive tape rated for automotive use.
The mount pulls away from the dashboard in hot weather but holds in cooler conditions. Heat is weakening your adhesive. Adhesive tape and gel pads both lose grip as temperature rises. The fix: apply a secondary reinforcement (gel pad plus tape), or relocate to a shadier spot on the dashboard that stays cooler.
The suction cup loses grip gradually over days or weeks. Dust, dried residue, or microscopic damage to the suction pad is breaking the seal. The fix: clean the suction pad and dashboard surface thoroughly, inspect the pad for cracks or wear, and reapply with firm, sustained pressure. If the pad is damaged, replace it.
The mount creaks or flexes when you touch the phone. The base is too rigid for your dashboard's curve, or the adhesive isn't fully cured. The fix: wait longer before adding weight (follow the adhesive manufacturer's curing time), or choose a mount with an articulating arm that may absorb movement.
Test curvature: Run your hand across the mounting area to feel for smooth curves or flat spots. A pronounced curve favors a flexible-base mount. Test adhesion: Push gently from different angles, rocking indicates poor contact; shifting indicates weak adhesion. Test heat sensitivity: Note if the problem worsens after sun exposure. If yes, relocate to a shadier spot or reinforce with a secondary adhesive layer. Test suction quality: Press firmly for 10 seconds, then pull gently. It should resist with noticeable force. If it comes away easily, clean both the pad and dashboard, then reapply.
Once you've identified the cause, apply the appropriate fix.
For poor contact due to curvature: Reposition to a flatter area, or switch to a mount with a flexible or ball-joint base. A flexible base can tilt and bend slightly to match the curve, maintaining contact across more of the base.
For weak adhesion: Add an adhesive gel pad under the mount base. Gel pads are reusable and conform to minor curves. Press the gel pad firmly onto a clean, dry dashboard, then attach your mount on top. If the problem persists, add a layer of automotive-grade adhesive tape (such as 3M VHB tape) under the gel pad for redundancy.
For heat-related failure: Apply a secondary reinforcement using both a gel pad and adhesive tape together for backup. Consider relocating to the shadiest part of your dashboard.
For suction cup failure: Clean the suction pad with a damp cloth and let it dry completely. Inspect it under good light for cracks, tears, or clouding. If damaged, replace the pad or the entire mount. If the pad is intact, clean the dashboard surface one more time with rubbing alcohol, let it dry, and reapply the suction cup with firm, sustained pressure for at least 10 seconds. Test the grip by pulling gently before adding your phone.
If targeted fixes don't solve the problem, consider switching to a windshield suction mount or an air-vent mount, which bypass the curved dashboard problem entirely.
A careful, methodical installation gives you the best chance of a secure, long-lasting mount. This sequence covers surface preparation, adhesive application, mounting, and validation.
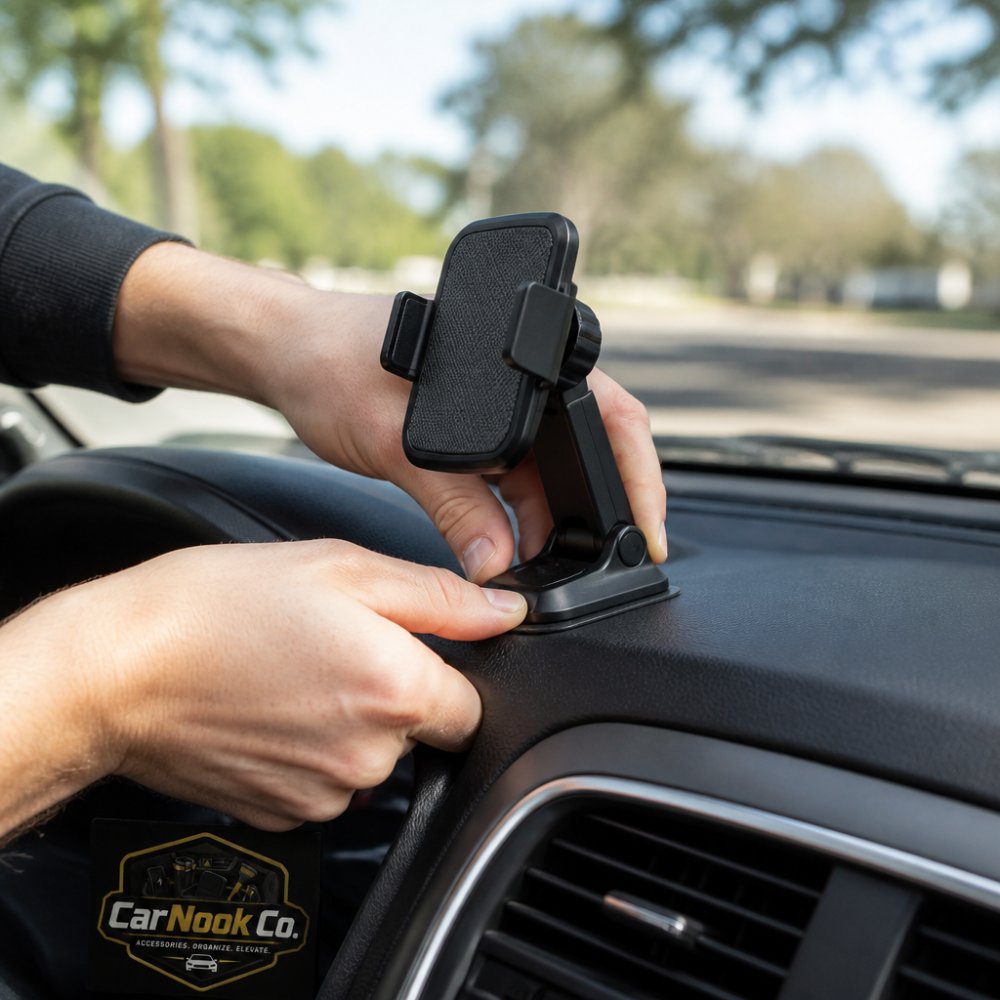
Run your hand across different areas to find the flattest section near the center console, below the steering wheel, or along the lower trim. Test your chosen spot by holding your phone there and verifying you can see the screen clearly without moving your head excessively. Check that the mount won't block air vents, controls, steering wheel movement, or your view of the road. Confirm the spot is away from airbag deployment zones. Use painter's tape or a light pencil mark to outline the area.
Wipe the marked area with a dry microfiber cloth to remove loose dust. Use a slightly damp cloth with mild soap and water, paying special attention to oily, sticky, or textured spots. For stubborn residue, dampen a cloth with rubbing alcohol and wipe the area. Let the surface dry completely. Do a final wipe with a clean, dry microfiber cloth right before applying adhesive or mounting the base.
The method depends on your mount type.
For adhesive-based mounts: Position the mount base on the dashboard and press down firmly with even pressure for 15-20 seconds. Do not move or adjust the mount for the time specified by the adhesive manufacturer. Check the product instructions, as curing times vary. If using a separate adhesive tape, apply it to the mount base first, then press the base onto the dashboard.
For gel pad mounts: Press the gel pad firmly onto the clean, dry dashboard with even pressure, ensuring no air bubbles are trapped underneath. Check the product instructions for curing time. Once in place, attach your mount base on top, pressing firmly.
CarNook™ DashGrip Phone Mount →
For suction cup mounts: Clean the suction cup pad with a damp cloth and let it dry, inspecting for cracks, tears, or cloudiness. Press firmly onto the clean, dry dashboard with steady, even pressure for at least 10 seconds. Pull gently to test the grip, it should resist with noticeable force. If it comes away easily, press again and hold longer.
Attach your phone to the holder and position it at the viewing angle that works best for your dashboard curve. Adjust any articulating arms or ball joints so the phone sits level. Check that it doesn't obstruct your view of the road, instruments, or controls. Tighten any clamp or grip gently but firmly so the phone doesn't shift during driving.
Before relying on the mount for navigation or phone calls, test it under realistic driving conditions.
Take a short drive in a parking lot or on a quiet street. Pay attention to any movement, creaking, or shifting as you accelerate, brake, and turn gently.
Observe whether the phone stays level and whether the mount rocks or flexes. Listen for any sounds that suggest the adhesive or suction is failing.
After the test drive, park safely and check the mount again. Gently push on it from different angles to confirm it's still secure.
If the mount shifts, creaks, or feels loose, park immediately and diagnose the problem. Reapply adhesive, reinforce with a gel pad, or reposition the suction cup. Do not drive with an unstable mount.
After installation, check your mount periodically, especially during the first week and after exposure to heat or vibration.
Adhere to the adhesive or gel pad manufacturer's curing and maintenance instructions. Some adhesives continue to strengthen over several days. Others may require periodic pressure or cleaning.
In hot weather, adhesive bonds can soften. If you notice the mount becoming loose after your vehicle has been in the sun, press it down firmly again or reinforce it with a secondary adhesive layer.
If you use a suction cup, clean the pad and dashboard periodically (monthly or as needed) to maintain a strong seal. Dust and residue accumulate over time and weaken the grip.
If you notice any signs of the mount failing, rocking, sliding, or peeling, address it immediately. A failing mount is a safety hazard.
When you eventually remove your mount, do it carefully to avoid damaging your dashboard.
For adhesive mounts, heat softens the bond. Use a hair dryer on low heat to warm the tape, then gently peel the mount away.
Pull slowly and at a shallow angle. Rushing causes the adhesive to tear and leave residue behind.
For any remaining adhesive residue, rubbing alcohol on a cloth works well. Rub gently until the residue rolls off.
Gel pads peel away cleanly if removed carefully. They rarely leave residue, which is one reason many drivers prefer them.
After removing any mount, clean the dashboard thoroughly with a damp cloth and let it dry completely.
If your curved dashboard won't cooperate, other spots in your vehicle may work better.
A windshield suction cup mount bypasses the curved dashboard problem entirely. The windshield is flat and smooth, making it ideal for suction cups.
Windshield mounts position your phone higher and more centered in your view. This can be better for navigation.
The main drawback is visibility. A windshield mount may obstruct your view slightly, depending on your vehicle and mount placement.
Check your local regulations. Some areas restrict windshield-mounted devices.
Air-vent mounts clamp onto your vehicle's dashboard air vents. They don't require adhesive or suction cups.
These mounts work well if your vent is positioned conveniently. They're easy to install and remove.
The downside is they can affect airflow from the vent, and they may not work with all vent designs.
Air-vent mounts are quick to set up and don't require any surface preparation.
| Mounting Method | Best For | Pros | Cons |
|---|---|---|---|
| Adhesive on flat area | Permanent, secure hold | Strong, reliable | Leaves residue if removed |
| Suction cup on windshield | Visibility, temporary use | Reusable, no residue | Less stable on curves |
| Gel pad reinforcement | Curved dashboards | Reusable, adapts to curves | Requires clean surface |
| Air-vent mount | Quick, adjustable setup | Easy installation | Blocks airflow, vent-dependent |
Successfully learning how to stabilize phone mount curved dashboard setups takes the right approach and proper preparation. Start by identifying the flattest area on your dashboard and cleaning it thoroughly. Choose a mount type that suits curved surfaces, such as one with a flexible base or adhesive backing. Reinforce your installation with gel pads or quality adhesive tape if needed. If your dashboard proves too challenging, windshield and air-vent mounts offer solid alternatives.
CarNook Co. offers practical solutions for keeping your phone secure while driving. The CarNook™ DashGrip Phone Mount combines an adjustable viewing angle with a compact design, making it easier to find a stable position on your dashboard. Explore CarNook's full selection of car phone mounts and vehicle organization products to find the setup that works best for your vehicle and driving needs.
Curved dashboards reduce contact area between the mount base and the surface, weakening adhesion or suction grip. Textured, waxed, or leather surfaces also reduce grip. If your phone holder keeps falling off the dashboard, the issue is likely insufficient surface contact, improper cleaning, or a mount base that doesn't match your dashboard contour. Reinforce with adhesive gel pads or 3M tape, and ensure you're mounting in the flattest area available on your dash.
Clean the surface thoroughly with isopropyl alcohol, then apply a high-quality adhesive tape or gel pad designed for vehicles. Position the mount in the flattest area of your dashboard to maximize contact. Press firmly, then allow the adhesive to set per the manufacturer's instructions before using. For extra stability, use a flexible mount base that can conform to the dashboard curve, or consider a windshield mount as an alternative if dashboard mounting proves unreliable.
You can use a phone mount for a curved dashboard, but success depends on choosing the right mount type and location. Flexible mounts with adjustable bases work better than rigid ones. Always mount in the flattest area you can find, avoid textured or leather surfaces, and use adhesive reinforcement. If your curved dashboard consistently causes problems, windshield mounts or air-vent mounts may be more reliable alternatives that don't require dashboard contact.
Test by placing the mount base against different areas of your dashboard. If you can't find a spot where the base sits flush with minimal rocking, your dashboard curve is likely too severe for reliable adhesion or suction. In this case, consider a windshield mount, vent mount, or a flexible mount with a contour-matching wedge designed to bridge the gap. These alternatives eliminate the need for a flat surface and work well on highly curved dashboards.

